
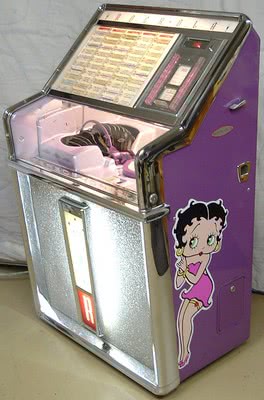
This article explains a more professional method to “free-play” a Rockola Princess Jukebox (model 1493). This theory can be adapted to many other jukeboxes, including other brands such as 1950s Seeburgs.
This method will: (1) not require any freeplay button, (2) prevent the Lock Bar Solenoid from energizing until the person begins selecting a song, and (3) keep the Select Light illuminated. Benefits: eliminates Solenoid noise during machine operation and standby, eliminates unnecessary solenoid wear, and increases usability and enjoyment of the jukebox.
Many customers buying a restored/reconditioned jukebox prefer the convenience of “free-play”. Free-play is when the jukebox will accept selections without the need to insert coins. Most sellers will simply mount an ugly push-button switch somewhere on the jukebox and tell the customer to ‘press the button when you want to play the jukebox.’ There are many problems with that approach, both usability problems and electrical/mechanical problems. For many 1950s and 1960s jukeboxes, a different approach to freeplay can solve those problems.
Among the more serious issues with a freeplay button is that it forces the person to either pick as many Selections as the button has added to the accumulator, or to leave the Solenoid energized and buzzing until the remaining selections are made. Thus, if the freeplay button is installed across the Quarter circuit, three plays (typically) will be added to jukebox accumulator. If the person only wants to play one song, the Solenoid remains energized while the record is playing, and ALL solenoids are noisy to a certain degree. Who wants to hear solenoid buzz while the music is playing? Likewise, this solenoid was NOT meant to be run continuously; it was intended to be energized briefly until the bar patron chose all selections, which would be less than a minute to accomplish. Sure, you could set the freeplay button to the dime circuit (1 play per freeplay button push), but then you have forced the customer to press this silly freeplay button for every song selection.
So What Are We Trying to Accomplish?
The purpose of this modification is to prevent the Lock Bar Solenoid from being energized continuously while the jukebox is on free play. This modification engages the Lock Bar Solenoid only when someone presses a Letter Button to begin the song selection process.
There are two small caveats to this modification:
- To make a song selection, the user MUST press the Letter button before pressing the Number button. This is not much of an issue, because the natural selection process is to press the Letter button first. (For example, the song is programmed at A1…people naturally choose “A-1”, …not “1-A”).
- If the jukebox is connected to wallboxes, and someone tries to make a selection from the jukebox AND a wallbox simultaneously, the selections will not register properly. This behavior will only occur if the selections are made simultaneously, because this modification eliminates the original function of the Letter Lock Bar Switch (its sole function was to PREVENT simultaneous selections). Since the jukebox is being sold for home use, this situation is unlikely to arise. Furthermore, the Princess does not even come with a Wallbox stepper by default, so simultaneous selections are impossible from the jukebox itself.
PROCEDURE:
The procedure below references the photos on pages 22 and 24 of the Princess manual. You should not work on any jukebox without owning a manual, but I have uploaded these illustrations for your convenience.
- Unsolder all wires from both Lock Bar Switches. You may discard the wires that simply jump from the Letter Lock Bar Switch to the Number Lock Bar Switch.
- Move the Tan-with-Black-Trace wire, and the Black Wire, from the Letter Lock Bar Switch over to the Number Lock Bar Switch.
- Remove the Tan Wire from the Lock Bar Solenoid, and move to the Letter Lock Bar Switch.
- Run a new wire from the Letter Lock Bar Switch back to the Lock Bar Solenoid terminal.
- Make sure the Accumulator Assembly has credits on it. This will close both Control Switches (Credit Switch and Select Lite switch).
- Physically “Adjust” the Accumulator Reset so that the Reset Pawl does not engage a tooth on the master ratchet when the Accumulator Reset coil energizes, thereby preventing any credits from subtracting from the Accumulator Assembly.


Mission accomplished. To revert to coin operation, you can either undo the whole process, or simply undo Step #6 above. If you only undo Step #6 above, and keep the selector modifications, they will not affect coin operation, but the user would still have to choose a Letter button first when making a song selection.

A final note: while you are working on the selector, this is a good opportunity to clean the switches with Deoxit and to replace the two large selector springs. These springs are usually weak, causing a weak “mushy” lockdown of the Selector Buttons. If you want those buttons to latch down firmly and completely, replace the springs. You may also need to perform the adjustments on page 25B of the manual, but realize that no amount of adjustment will compensate for weak springs.
regards,
Bob Putnak.
eBay ID = rjputnak
© 2008. All rights reserved.